With MemberTies Professional you can send email to virtually any collection of members. You can send to all members you select on the Membership List, or all members of a group, attendees of an activity, etc. Email is sent using your own email account, so you must have an internet connection and a valid email account somewhere. When the email window opens, it will automatically populate its address list with email addresses based on where you were when you opened the window, as described below.
When email is sent, there are various ways to address the message(s). By default, the system generates an email for each recipient, so their email address shows up in the To: field of the email, rather than buried spam-like in a blind-copy list. If you wish, you can still choose to put email addresses in the "To", "CC", or "BCC" fields of the message, but it is less professional and can expose recipients' email addresses to each other.
Warning: SPAM email (also known as unsolicited commercial email) is a growing problem on the Internet today. If we determine that you are using MemberTies Professional to send SPAM, we will terminate your license and report you to the appropriate authorities. Using MemberTies Professional to send unsolicited email (SPAM), or to transmit illegal content is expressly forbidden.
Note: You must have an internet connection and your own email account in order to send email. MemberTies is not a standalone mail server.
Sending Email
1.Choose the Members, Groups, or Activities tab from the ribbon bar.
![]()
2.In the list that opens, select the records to whom you want to address email. You can use the standard Windows selection methods.
Note: If you choose Group, you will be prompted for whether you intend to email all members of the group, or the group contact itself.
Note: There are various places in the system where an email address is displayed as a data-entry field. When an Email icon appears next to a field, you can click the icon to open the Send Email window with the current address displayed.
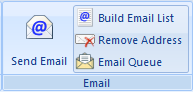
3.In the Email section of the ribbon, click Send Email.
4.The Send Email window will open, defaulting to the Message tab.
The Message Tab
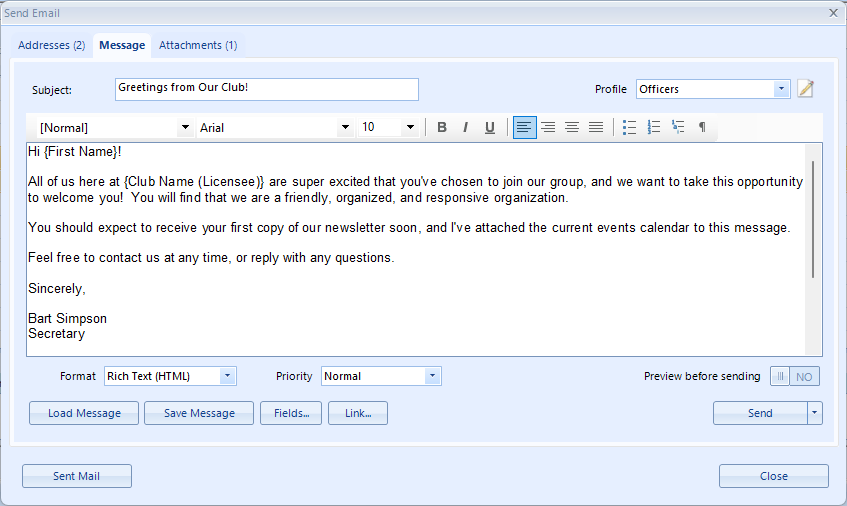
1.There are several fields and options available:
• Subject - the subject line for the email
•Profile - lists the available email profiles defined in your database. To manage the available profiles, see Working with Email Profiles.
•Message Body - the large unlabeled area is for the actual text of the message. By default the system assumes you will create a "Rich Text" or "HTML" formatted message, since this enables the use of styles and font properties like bold, italic, etc. If you would prefer to create a plain text message, use the Format list below the message to switch.
Note: While it is possible to cut/paste an email message from another source, such as a word processing document, another email client, etc., you should be sure to send a test message to see how it converts. There are hundreds of character sets, fonts, and formatting tools out there, and their output may not convert neatly to HTML email. For things like bulleted/numbered lists, put the mouse cursor on a bulleted line and see if the Bullet toolbar button activates. If it doesn't, then it isn't being seen as a bulleted list and it may not display correctly. Reformat the pasted text as necessary.
•Format - Sets the text format for the message. Rich Text format provides a toolbar of formatting options that is unavailable with plain text.
Note: If you start a message as Rich Text, add bold, italic, or other formatting and then switch to plain text, the formatting may remain in the message but since the message will not be sent as HTML it will not be used.
•Priority - the priority of the message. Note that there is no guarantee that the recipient's mail software will care about this setting.
•Load Message Button - enables you to load a saved message for editing or reuse. See Loading Email Messages for details.
•Save Message Button - enables you to save the active message, including attachments, under a unique name. Messages are stored in the database so they are accessible to all users.
•Fields Button - displays or hides the list of available fields to embed in the email text. When a field is inserted into an email message, the system will use the appropriate data for the associated member's record in place of that field. Note that database fields can only be used if you are using the Personalized Messages addressing method (see Addresses Tab below) because the system has to know what recipient’s record to use for the data. See Using Database Fields for more information.
•Link Button - enables you to insert a hyperlink for a website URL into the message.
•Preview before sending - controls whether each message will be displayed in a preview window before it is sent
•Send - this button actually has two options. Click the arrow on the button to switch it from normal send mode to testing mode. In Test mode, the system does everything except actually hand the email to your mail server. So all address checking, paging, connection checks, etc., will happen, but no email will be sent.
•Sent Mail - opens the history of sent mail.
2.When the message is ready, click Send.
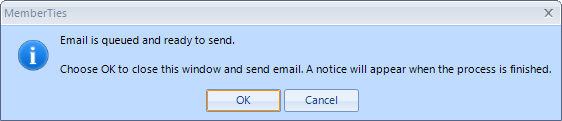
3.All email messages will be generated and sent to the email queue for background sending. At this point you can close the email window and continue working in elsewhere in the system while email is sent in the background. See Email Queue for more information.
The Addresses Tab
All recipients (everyone who will receive the email) are listed here.
Note: The text of the tab also indicates the number of recipients.
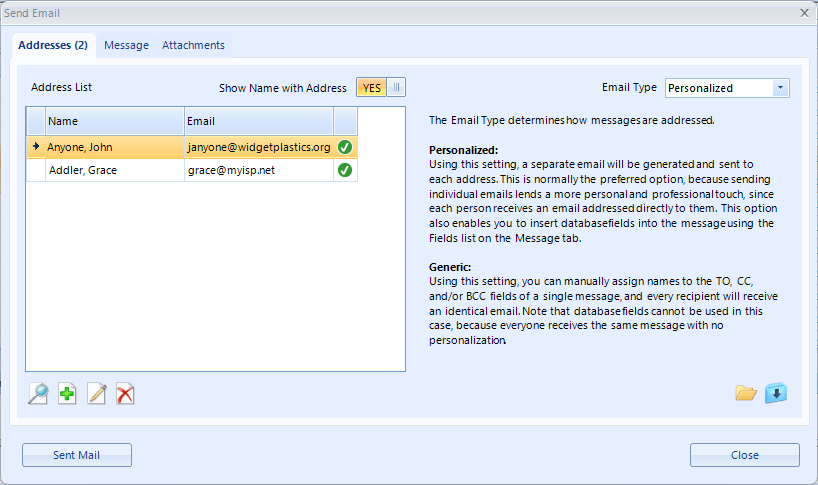
The most important setting on this tab is the Email Type. There are two options available:
•Personalized - this option causes the system to format a separate message for each person in the address list. When this option is selected, the list of database fields on the Message tab is available. This is the preferred option, because each person gets a uniquely addressed email, and never sees the addresses of any other recipient.
•Generic - this option enables you to choose which field (TO/CC/BCC) to use for each address. The "TO" field is normally used for the primary recipient(s) of the message; the "CC" field is normally used for people of secondary importance (i.e., people being "copied" on the message); the "BCC" field is used for people who need to see the message but whose addresses should be invisible to all other recipients (i.e., people being "blind copied" on the message). Note that this method is often faster when sending an attachment, because the attachment only has to be processed one time, rather than once per recipient, however, it also looks more "spammy" because the receipt addresses are hidden, and it may red-flag your email by spam checkers.
After the Email Type is selected there are several additional options available
•Show Name with Address - controls whether the member name is displayed with the email address (i.e., show "John Smith <jsmith@myisp.com>" instead of just the email address)
•To search for one or more membership records and automatically add their email address(es) to the list, click the Search icon below the Address List.
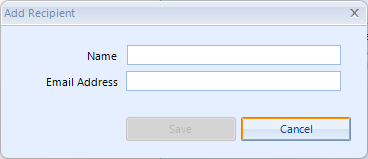
•To manually add a new recipient to the list, click the Add icon. You will be prompted for the name and email address.
•To modify an existing recipient, select it and click Edit. Note that changes only affect the list, not the underlying member record.
•To delete an existing recipient, select it and click Delete. Note that this only affects the list. It has no effect on the underlying member record.
•To save the recipient list to a file for future reuse (including the designations for the TO/CC/BCC fields if appropriate), click the Save icon.
•To reload a saved recipient list, click the Open File icon. Note that reloading a save list causes all addresses to be appended to the existing list. This enables you to open several saved lists to create a combined list.
The Attachments Tab
All attachments that will be included with each message are displayed here.
Note: The text of the tab also indicates the number of files. i.e., "Attachments (1)" indicates there will be a single file attached to each message.

Click Add to select a file from your file system, or Delete to remove a file from the list.
Note: A common source of email delivery issues is very large attachments. With modern cameras, images can be extremely large, and attaching a newsletter PDF with dozens of high resolution images in it can mean each email message may be multiple MB in size. If you send an email that includes a 20 MB attachment, you may completely fill up their inbox space. Or the message size may be larger than their mail server allows (often defaulting to 8 MB).
If you have a large newsletter or document to send everyone, consider saving it on a public system like Box or Dropbox or any other location where you can send a link to the fine instead of the file itself. Then your recipients can download the file as needed. Your email will also be processed much more quickly.