The search criteria area works just like other MemberTies search windows. You can enter one or more criteria values, and when you click the Search button, the system will try to find the matching record.
If you have the member ID on a bar-coded membership card, you can leave the cursor in the Member ID field, and when the card is scanned, the system should automatically display the member if the ID matches a record in the system. The bar code needs to contain the exact matching member ID, and the scanner you use needs to terminate the scan with a "carriage return" or "enter key". This simulates you pressing the Enter key on your keyboard, which triggers the Search button.
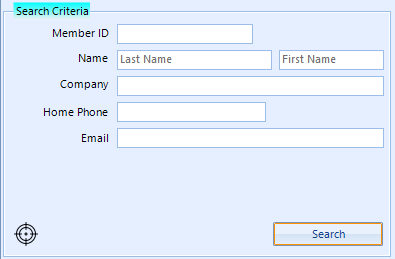
Setting a "Favorite" search field:
The "target" icon in the lower left of the Search Criteria section enables you to choose the search criteria field the cursor should return to when you press the Escape key or complete a successful Check In (if the Reset on Check-In preference is turned on).
If you're using a scanner to display membership records, you can essentially scan the card, review the member, click "Check In," and the cursor will immediately return to the favorite field with the screen reset for the next person. If, for some reason, the cursor needs to return to the favorite field sooner, you can press the [ESC] key to force it. To set the favorite field, put the cursor in the desired field, and click the icon.
Note: You can specify certain custom fields to be displayed below the existing search fields. Normally one or two fields will fit, but if you have a large monitor you may be able to add more. Use the Custom Field maintenance window to mark a field as usable for Front Desk searches. See Maintaining Custom Fields for more information.
Multiple Matching Records
If more than one record matches the search criteria, a list of matching records will be displayed so you can choose the desired record to use, or just check one or more in immediately:
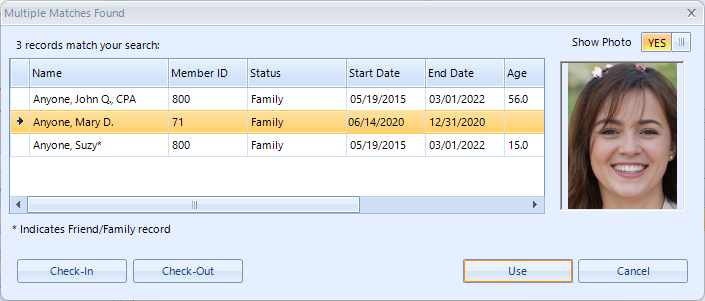
Options on this window:
•Check-In - Enables you to check-in one or more records automatically, without ever displaying them on the main window. Note that if you select a record that is already checked in, the resulting behavior depends on your Front Desk preference settings. The system may ignore it, prompt you, or allow it to be checked in a second time.
•Check-Out - Enables you to check-out one or more records, similar to the Check-In option above. This options works like the unattended mode check-out, in that it finds all open (not-checked-out) attendance entries for the member on the current activity and closes them.
•Use - Displays the selected record in the Member Synopsis area, ready to be checked-in. This happens automatically when your search only yields a single matching record.
•Show Photo - controls whether the photo is displayed
•Friend/Family members are shown with an asterisk (*) next to their name. Note that a family member has to have "Allow Check In" set to Yes on their record in order for the search to find them. See Member Friends and Family for details.
Member Synopsis (the search results)
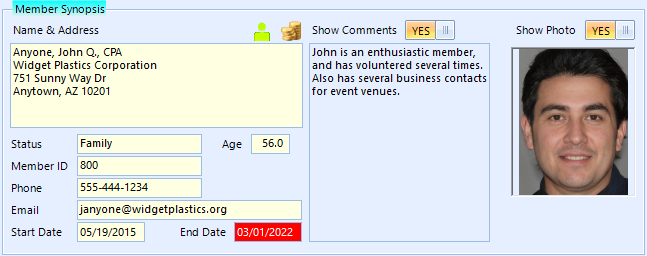
The Member Synopsis provides basic membership information at a glance. The information displayed in the Member Synopsis can be limited by the Limit Synopsis Data preference.
In this area:
•The Person icon - located just above the name & address area, enables you to open the member record for editing
•The Money icon - located next to the Person icon, enables you to post new dues or donations entries for the member (the availability of this icon is controlled by the Allow Dues Entries preference)
•Show Comments - controls whether comments from the member record are displayed
•Show Photo - controls whether the member photo is displayed
•End Date - the End Date field will display in red when the date is in the past (i.e., an expired member)
Note: Two system preferences apply to checking-in a person with an expired End Date:
oThe End Date Validation preference will prevent the check-in entirely.
oThe End Date Warning preference is similar, but will cause a pop-up message to display a warning, while allowing the checked-in to continue.
• Double-click the photo to view a full-size version.