With MemberTies Professional, you can keep track of all members who attend an activity, the role they played, what they spent, and their attendance status, and whether the brought any guests. This makes it easy to track things like "who was the host", "who declined to attend", "who tended the bar", etc. The combination of member name, role, and status lets you easily track the people involved.
This page provides a standard dual view of data, showing the list of existing records on the top, and the details below. See Editing Records for more information.
To create a new record, click Add; or, select an existing record and click Edit, or Delete.
The count of attendees and guests is automatically updated on the General Info page as changes are made here.
Note: These instructions cover adding attendees individually from the Activity record itself. You may also add multiple members to an activity at once directly from the Membership List. See Adding Members to an Activity for details.
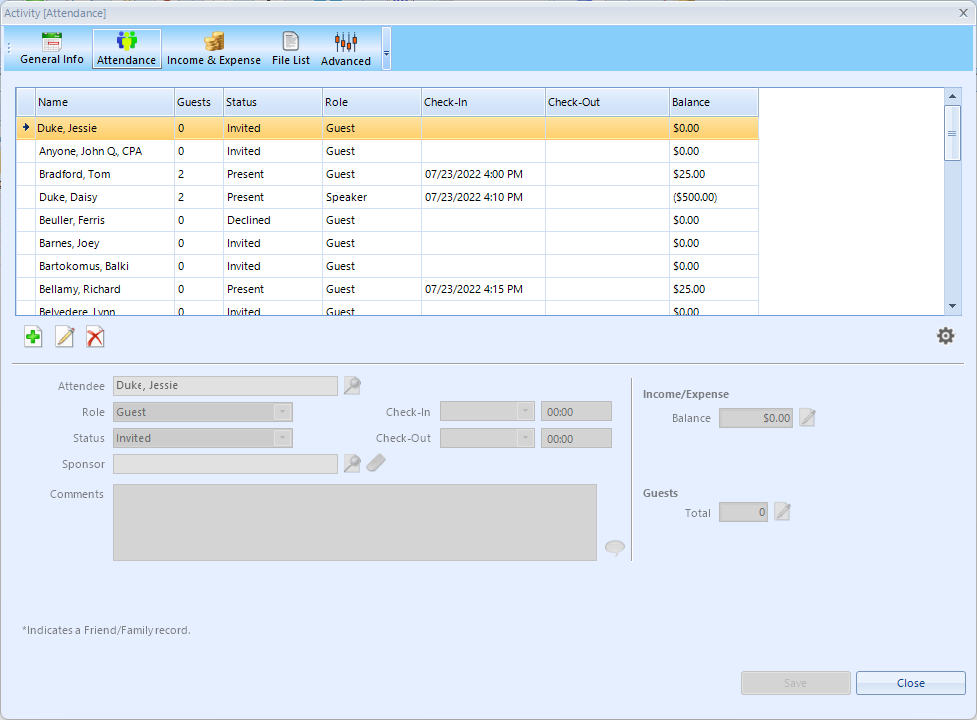
Working with Attendance
The following fields are available:
•Attendee - the field itself is not editable, but the search icon displayed to the right enables you to search for the attendee(s). The way the search works changes based on whether you are adding or editing:
oAdding - When adding a new attendee, you can select multiple members from the quick search window, and all settings (role, status, dates, postings, guests) will all apply to each selected member. When you save, a new attendee record will be created for every selected record.
oEditing - When editing an existing attendee, you can change the name but can only search for one record to replace it with. i.e., you can edit one record into multiple.
•Role - lists all Activity roles defined in the database. See Maintaining Activity Roles for information.
•Status - lists all Attendance Statuses currently defined in the database. See Maintaining Attendance Statuses for more information.
•Sponsor - enables you to select an optional sponsoring member for the attendee. Use the Choose Sponsor and Clear Sponsor icons next to the field to change the selection.
•Comments - additional details about this attendee
•Check-In - the date/time the person arrived at the activity
•Check-Out - the date/time the person left the activity
•Income/Expense Balance - displays the current balance of all postings tied to this attendee. See below for more information about adding Income and Expense entries.
•Guests Total - displays the count of guests linked to this attendee. See below for more information about adding guests.
Note: The attendee list also includes a right-click menu that has the following options:
•Open Member - when a single row is selected, choose this option to open that member record for editing.
•Multi-Record Update - when two or more rows are selected, choose this option to make basic attendance changes to all selected rows. See Multi-Record Update for details.
Income and Expenses
Click the Edit icon next to the current income/expense balance to work with postings.
This will open the Maintain Attendance Postings window.
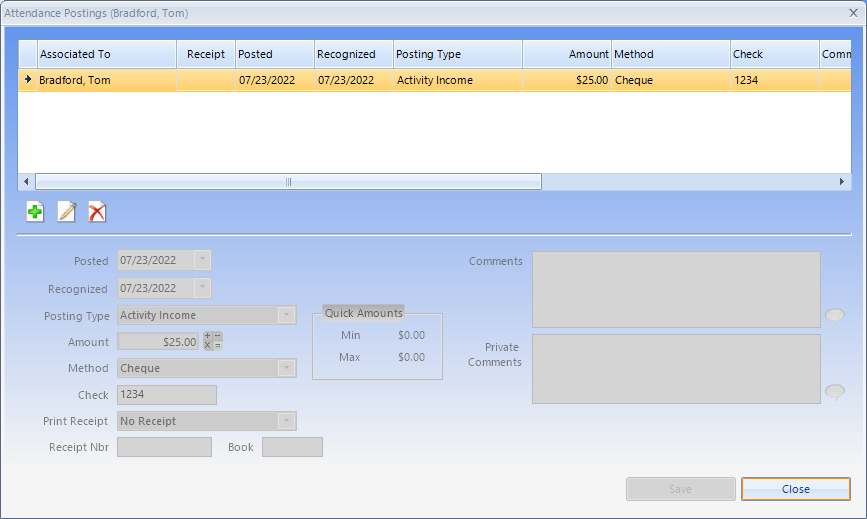
The following fields are available:
•Posted - the date on which the entry is being recorded
•Recognized - the date on which you want the amount to apply to your organization. Since most activities tend to start and end in a short time period, the date recognized will normally be the same as the date posted. But if you need to prepare for an activity during the latter part of one year but actually account for it the following year, you can use the date recognized to identify these entries. That way, a report run for the first quarter of next year will show an entry that was actually posted the year before.
•Posting Type - the posting type to be applied to this entry
Note: The posting type will be defaulted to the default Activity posting type specified in the Posting Types list, if available. If no default has been set, the type will be blank. See Maintaining Posting Types for more information.
•Amount - The amount to be recorded. Only positive numbers may be used. The posting type determines whether the amount is applied as a debit or credit to the account.
Note: The Quick Amounts section shows any minimum or maximum amount defined for the selected posting type. These amounts can be quickly entered by clicking the amount.
•Method - the payment method used. See Maintaining Payment Methods for more information.
•Check - the cheque number or other payment identifier
•Print Receipt -controls when a receipt should be printed for the entry:
•No Receipt - indicates that no receipt needs to be printed at all
•Mark for Printing - indicates that the record should be marked so that you can run a receipt report from the Reports window, and use Activity Print Receipt as part of your report criteria to print all marked receipts at once.
•Print on Save - indicates that a receipt will be automatically printed when the OK button is clicked to save the entry. Note that the system will automatically switch the setting to "No Receipt" after printing. You can also print a receipt by selecting the saved record on the Income/Expense list.
•Receipt Nbr/Book - these fields are enabled whenever the selected posting type is one that has been defined to generate a receipt number. The fields are disabled for all other posting types. The Receipt Number is a sequential number generated by the system. The Receipt Book is the value set in preferences.
Note: The receipt number is not automatically generated until the record is saved or a Receipt is printed via the Receipt button. This ensures that the next receipt number is not used until it is needed.
Note: if the receipt icon is displayed next to the Book field, it enables you to force the system to generate the next receipt number immediately. Note that once a receipt number has been generated, it is "used" permanently, even if you choose not to save the entry. The only way to reset it is via the Receipt Book Numbers preference. If you want to "regenerate" a new number for an entry that already has a receipt number, you must clear the field first, then click Assign Now to generate a new number. If you do not want the Assign Now option to be available at all, it can be turned off via the Display Assign Now preference.
•Comments - general comments about the entry
•Private Comments - comments that will not appear on any system report
Guests
Click the Edit icon next to the current guest total to work with the guest list.
![]()
This will open the Maintain Guests window.
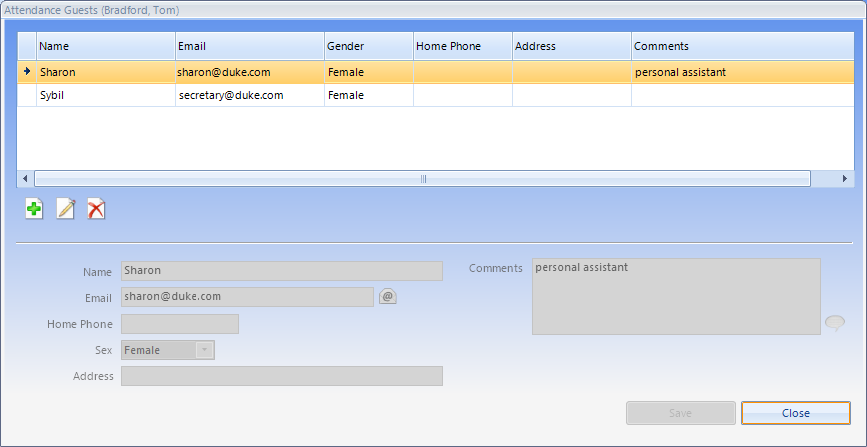
The following fields are available:
•Name - the guest full name
Note: If all you care about is that the guest exists, this is the only field needed. Just enter a name and click save. That is enough to increase the guest count.
•All other fields are self-explanatory.